


Serving
Cooking Time
Difficulty
When I first saw these cookie cutters, I knew immediately that I had to get them so that I could make these insanely adorable I Love You Beary Much Cookies. I mean, look at these!!! How can you not fall in love with these darling little bears??!!
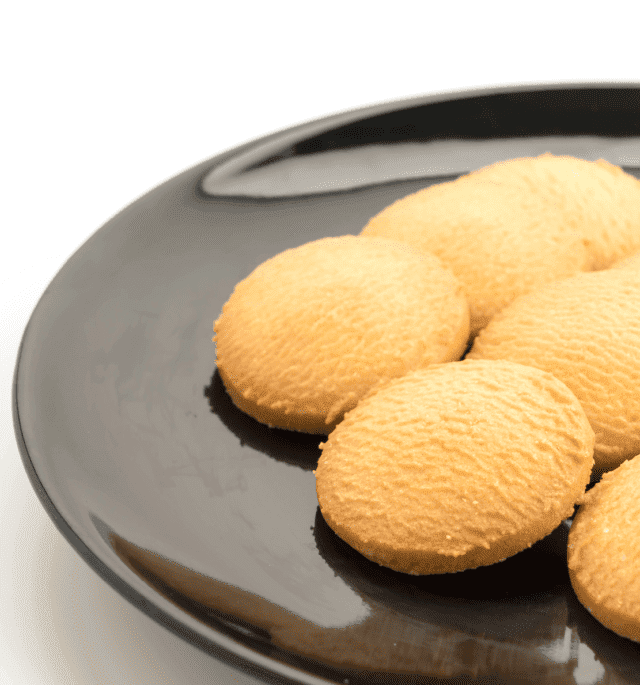
Made with my special butter cookie recipe, these cookies are easily cut out and hold their shape in the oven. They are so buttery in flavor and with a texture that’s lightly crisp on the outside and chewy in the middle. And since butter cookies are even more delicious when iced, these cookies are iced on the backside so that the details of their adorableness remain undisturbed.
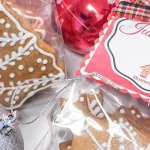
Looking for that perfect homemade Valentine’s Day gift? Well, these are them!!! I highly recommend that you make a dozen or two of these I Love you Beary Much cookies, package them up in pretty little boxes tied with big red bows and given them out to all the people who matter most to you! I know that if I were the recipient of these adorable bear cookies, I’d absolutely fall in love with the giver! Make magic happen! Make these cookies for Valentine’s Day!
If you enjoy icing cookies, be sure to check out my Glass Snowflake Butter Cookies here

I LOVE YOU BEARY MUCH COOKIES
- 3-1/8 cup(390g) All-Purpose Flour
- 1/2 tspBaking Powder
- 1 cup(227g) Butter, Softened at Room Temperature
- 1 cup(200g) Granulated Sugar
- 1/4 cup(60ml) Milk
- 1Large Egg
- 1 tspVanilla
- 1/2 tspAlmond Extract
- Red Gel Food Coloring
- 3 oz(6 tbs) Pasteurized Egg Whites
- 1/4 tspCream of Tartare
- 4 cups(500g) Confectioners’ Sugar, Sifted
- 1 tspClear Vanilla Extract
Instructions
- In a large mixing bow,l whisk flour and baking powder together to combine. Set aside.
- In a stand mixer, outfitted with a paddle attachment, cream butter and sugar together on medium speed until light and creamy. Add the milk. egg, vanilla extract and almond extract. Mix until well incorporated. .Add the flour mixture and mix on low speed until the dough comes together. Do not over mix.
- Remove approximately 1/8th of the dough. Add enough red gel food coloring to color the dough red. With floured hands, fold the dough onto itself. Coat your hands with more flour as needed. For a marbled dough, fold until a marbled effect is achieved. For a fully red dough, continue folding until the dough is completely red.
- Place the red dough on a well floured work surface. Using a rolling pin, roll the red dough out to 1/8″ thickness. Using a small heart or flower cutter, cut out hear or flower shapes. Set the cutouts aside. Wash your hands before touching the other portion.
- Clean the work surface to remove any red food coloring. Flour the surface well. Then transfer the balance of the dough onto the work surface. Using a rolling pin, roll the dough out to 1/4″ this time. Using a huggy bear cutter, cut out the bears. Transfer the bears onto a parchment lined cookie sheet, placing them 2″ apart. Place one heart or one flower on the belly of the bear. Fold the bear’s arms in so that they are holding onto the hearts or the flowers. Using a little water as glue, attach the paws to the hearts or flowers.
- Place the cookie sheet in the freezer to chill for at least 15 to 20 minutes.
- Move the oven-rack to slightly lower than the middle position. Preheat oven to 350 degress Fahrenheit.
- Bake the cookies for 15-16 minutes until they are barely golden around the edges. Remove the tray from the oven and allow the cookies to cool on the tray for about 5 minutes before moving them onto a cooling rack to finish cooling.
- For the royal icing: In a stand mixer or using an electric mixer, whisk egg whites with cream of tartare until foamy. With the machine on low speed, gradually add the confectioners’ sugar, whisking in between until fully incorporated. Add the vanilla extract. Increase speed to high and continue whisking until mixture is very thick and forms stiff peaks. Transfer royal icing into a piping bag and pipe as usual. Store any unused royal icing in an airtight container to prevent icing from drying out.
- Once the cookies are cooled, using a piping bag, pipe an outline of the bear on the back of the cookie. Then flood the cookie with royal icing, making sure to not overfill the icing. Place bears face down on a parchment lined cookie sheet so that the icing may set – which will take approximately 2 hours. Once the icing is set, store the cookies in an air-tight container. Give these I Love You Beary Much Cookies out to friends and family and watch them fall in love with them! Enjoy!